So here’s this week’s:
Meme instructions: Blog a tutorial and teach me something that you think I might not know about (even if I do, doesn’t matter, do it anyways). The tutorial can be something within Second Life (how to build, create tattoos or clothes, pick up guys at info hubs, tie your virtual shoelaces, whatever…) or something in Photoshop or on any social network (just focus on something sl-related somehow). Make it informative, make it hilarious, make it whatever you like! I’d just love to learn something from you that you may be good at and are willing to share. Remember to leave your link in this meme’s post so others can come by and learn too!
I thought I would take the opportunity to teach you a little about how I get the photos I get in SL that people just go so gaga over. These are probably going to be pretty straightforward instructions to anyone who’s bothered with the in-viewer post-production tools, but here we go!
STEP ONE:
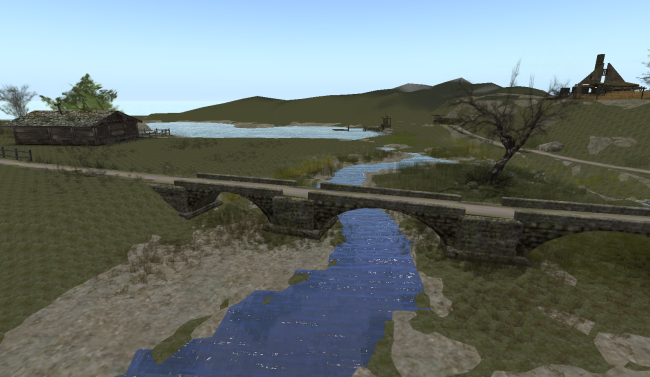
Find your scene. The scene you want to photograph doesn’t have to be perfect or beautiful or what other people tell you is perfect or beautiful. Find a scene that captures something that speaks to you. Here I am on Roche, a nice simple barren-yet-rich sim which affords a ton of good opportunities for photography, and I figured you might find it useful too, as a place to experiment.
One of the main features of the sim is this bridge, and small wonder why: it’s quite lovely!
Took this photo after a bunch of moving the camera around to find the ‘right’ angle: dunno, something about this angle and layout just reverberated for me. Once I found that right angle, I worked on framing things up- getting in far enough or out far enough to include all the details that make the image work. Camming in on stuff to force textures to rezz. Things like that. It’s a pain in the neck, I know! But that’s step one.
STEP TWO:
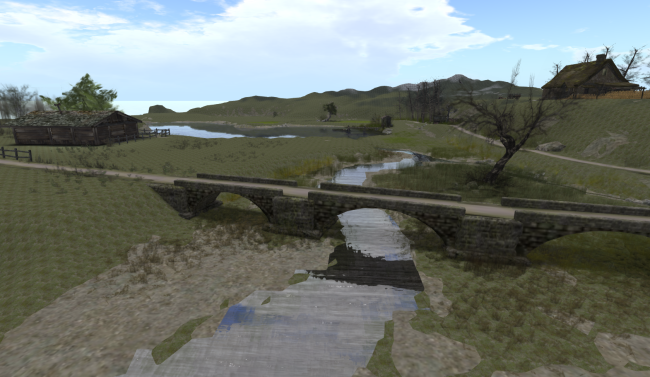
I then go up to a more median graphics range (that first pic? low graphics. Yes, that’s right, LOW), so I can test things out on the appearance of the sim.
Notice how, at a higher graphics setting, the skyline of the hills that dominate the island have become a little more bumpy and irregular? And the water reflection has changed, too. It’s always a good idea to assess the photo a bit at a higher graphics, because I find that when I go up to Ultra, I can hardly MOVE the camera let alone adjust things fine and neat.
I also start playing around with sky and water settings, here: do I want the water to look glassy? Wind-ruffled? Do I want the sky bright or dark? Warm or cool?
STEP THREE:
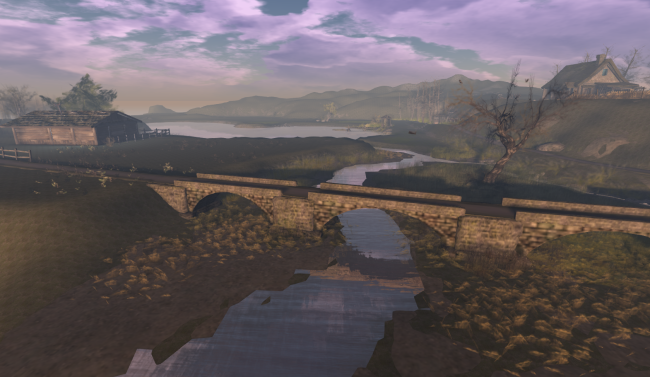
Now I go up to high graphics, and play with the environment editor, as well as the sky presets. First task is to find a sky setting that really brings out the beauty of the sim. Once that’s been handled (and I often go for dawn/dusk windlight settings, for some reason), I flip on the advanced lighting and start looking at shadows. are they falling in the right place? Are they falling too long? Too dark? by adjusting the eastern angle of the sun/moon (same thing, really, to Windlight), and the dawn-to-dusk of it, I can get those shadows to lay where I think is best for the picture. Then comes 5-10 shots of the image with slightly different settings, different colors in the sky and sea, and even the clouds sometimes!
And that’s… actually, really, all I do other than cropping. Now, you know the terrible terrible secret. Guard it well, stranger, and know that such knowledge is a powerful and dangerous burden.
And that’s what’s new today!


Beautiful, love the clouds in the last one especially. Thanks for sharing!
Thanks for the meme! It was so eerily well-timed: I literally had just taken the third photo when I IMed a friend and said ‘I wonder if I should teach people how I do landscape photos in SL…’ and she said ‘what, like Strawberry’s meme this week?’
lol well that worked out well for sure then!
Oh and if memory serves, that last one was straight up ‘[TOR] DAWN – Barcelon 2’ windlight setting, with a bit of rotation on the sun’s location. I really must start stylecarding these…
Browsing, I have been using the cirrus cloud setting that you pointed me at. Hah!
Thanks so much for sharing this!
You’re quite welcome: I hope it’s helpful in your efforts!
Oh, thank you for this! I totally suck at landscape photography. I’ve played around with WL settings, but it’s not my strong suit. I need to practice more – maybe with trial and error I can find something that works 🙂
I’m glad this was useful!
I tried to give a very basic overview of my technique: there’s a lot of it that’s just trial-and-error, winging it. Give yourself permission to explore what windlight can do for you: you’re going to find stuff that doesn’t work now, but might work somewhere else. Or that aren’t just what you’re looking for. Give yourself room to experiment: it’s amazing how much you can do with just the camera effects! I’m still trying to master Depth of Field, myself: I always get things too fuzzy in foreground or background.
So hey, there’s always more to learn: heck, I hadn’t used advanced settings on high graphics resolution before this year!
I think I need to learn patience first. I’ve been stretching mine trying to learn PS – I think WL settings might be less stressful!
Oh yeah, I definitely find WL far less stressful than using offline graphic manipulation stuff: it’s a far more instant effect. And if you find yourself in a corner, just step things downwards on the graphics slider, and it’ll take you to the defaults for that lower setting, which will undo any settings you’ve made that screw things up. 🙂
Pingback: The by-product of restlessness | Bit of Spunk
A great job with the before-and-after, here! I’m definitely going to redo this instructional with some ‘oops’ photos in there, and some pics of where the controls are in firestorm, as that’d probably help a lot of folks out. 🙂